Code Server for VS Code
Visual Studio Code (VS Code) is a lightweight and highly customizable source code editor developed by Microsoft. It is designed to provide developers with a powerful and efficient environment for coding, debugging, and building applications. VS Code supports a wide range of programming languages and offers features like syntax highlighting, intelligent code completion, debugging capabilities, and Git integration. It also provides a vast library of extensions that enhance its functionality, allowing developers to personalize their coding experience based on their preferences and requirements.
For a detailed documentation of VS Code, please see https://code.visualstudio.com/docs.
While development is very convenient using VS Code sessions launched via the terrabyte portal, and we recommend this as the preferred approach, these sessions do not allow for submitting SLURM jobs for testing because the sessions themselves run as a SLURM job, and submitting SLURM jobs from within a running SLURM job is prohibited. However, -although a bit less convenient- it is possible to connect to terrabyte via a local VS Code session through SSH, which allows for submitting SLURM jobs. We explain this possibility at the bottom of this page..
Start a new VS Code session
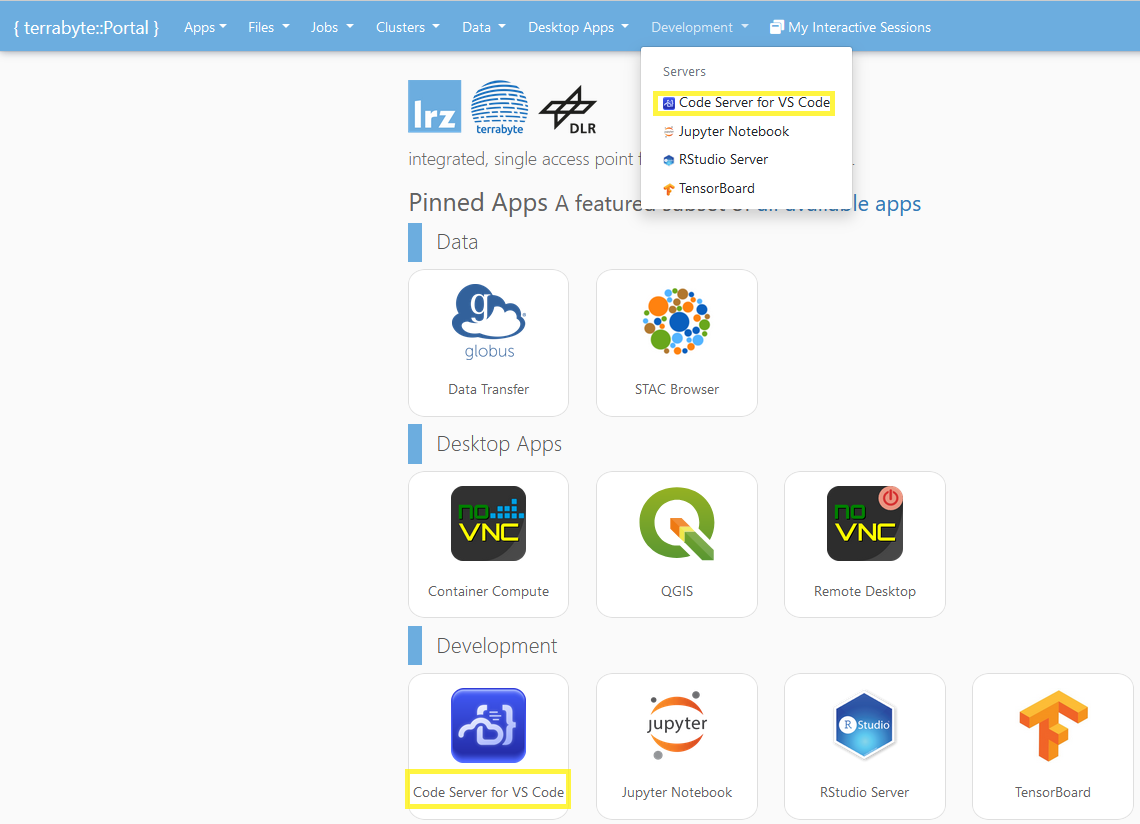
In order to start a new VS Code session on the terrabyte Portal,
- Click on the Code Server for VS Code icon on the dashboard or select Code Server for VS Code in the drop down list under Development in the upper menu bar.
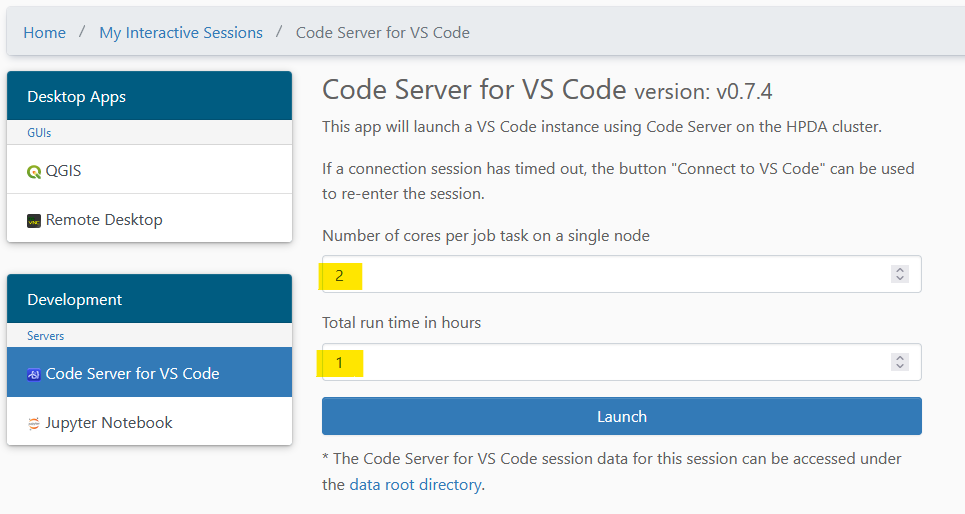
- Select the cluster partition and the resources to be used for the session and click on Launch.
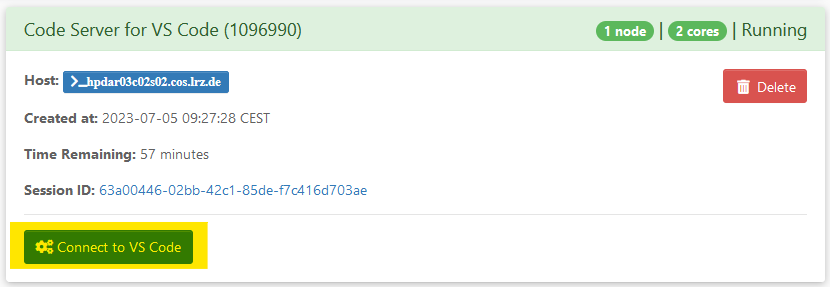
- Once the session is ready, you can connect to it via Connect to VS Code.
If you have to wait for long times until your session gets launched, select a different cluster partition. hpda2_compute is usually a good choice.
You may check available cluster resources with sinfo on the login node.
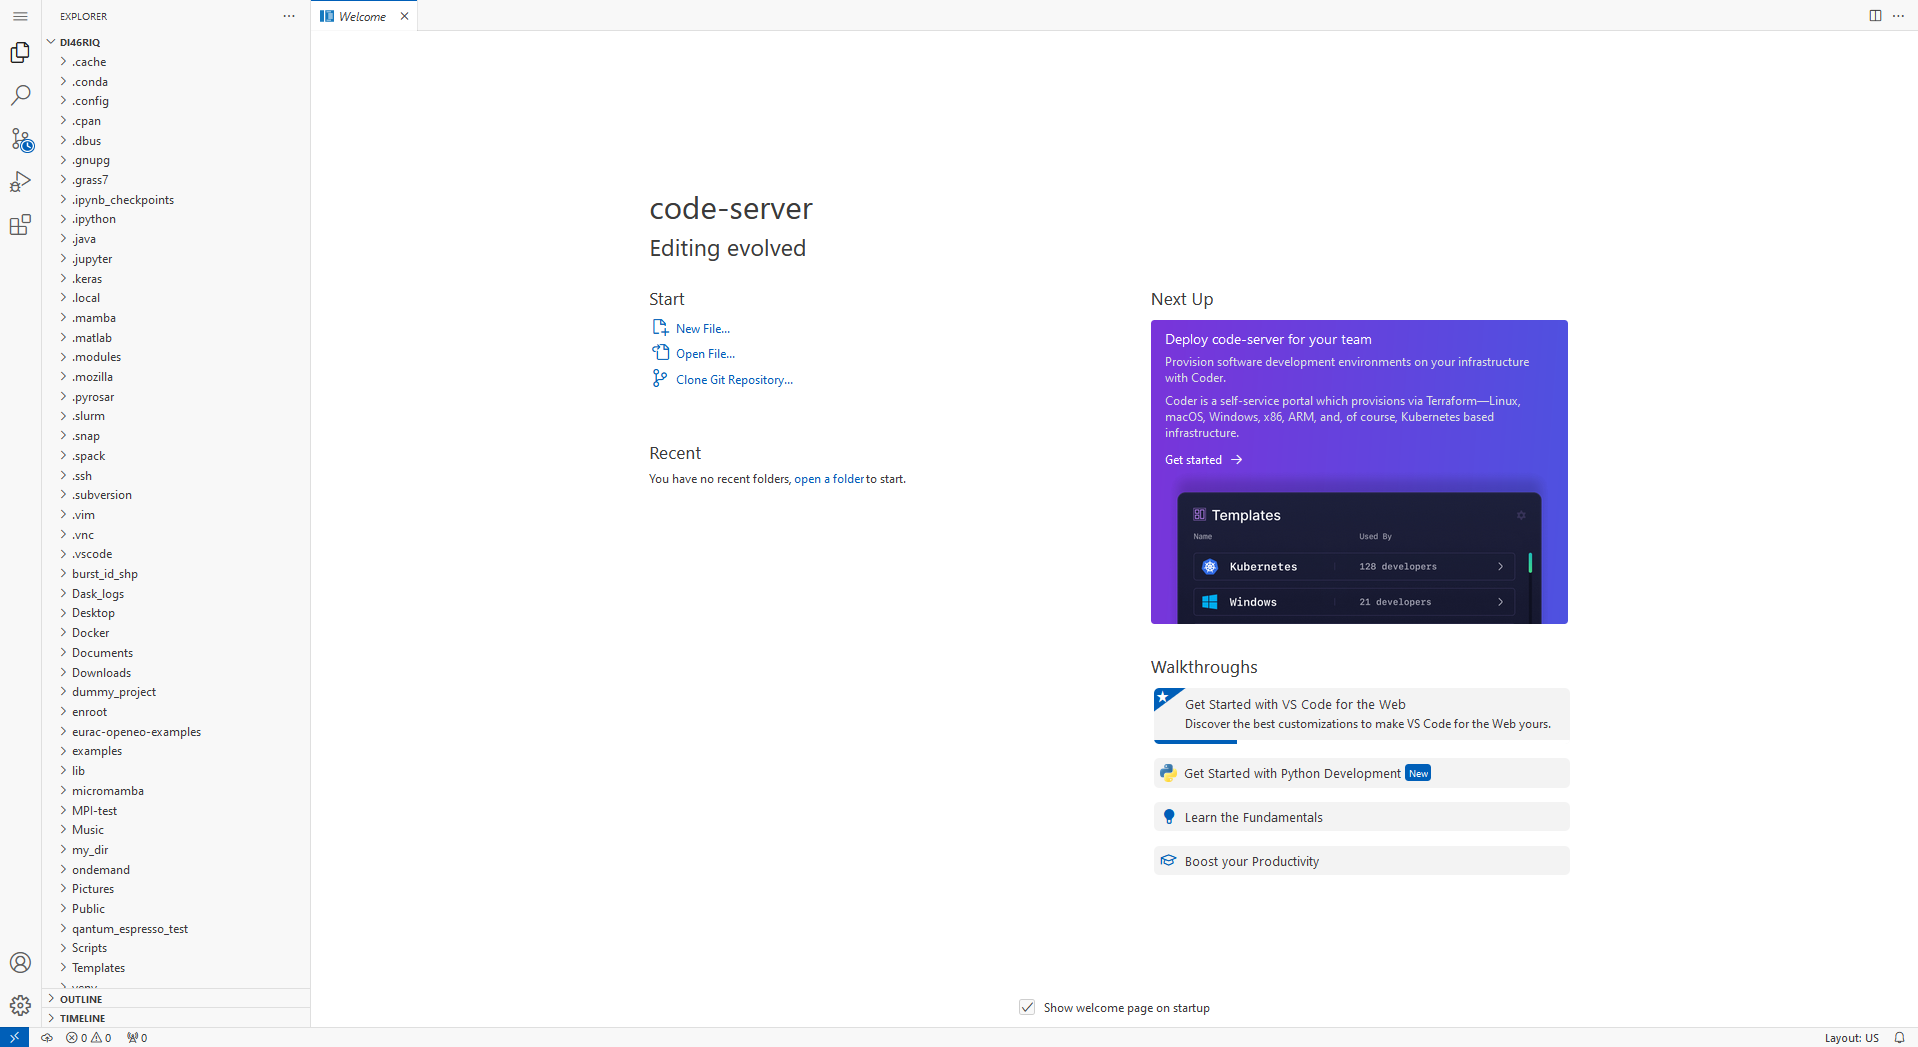
- A new browser window with VS Code will open. Be patient: It may take some seconds until the application is completely loaded. Your browser window may stay blank white during loading.
-
By default, the file explorer shows your home directory. You can access other folders/projects on the DSS by clicking on the menu icon
 → File → Open Folder.
 -
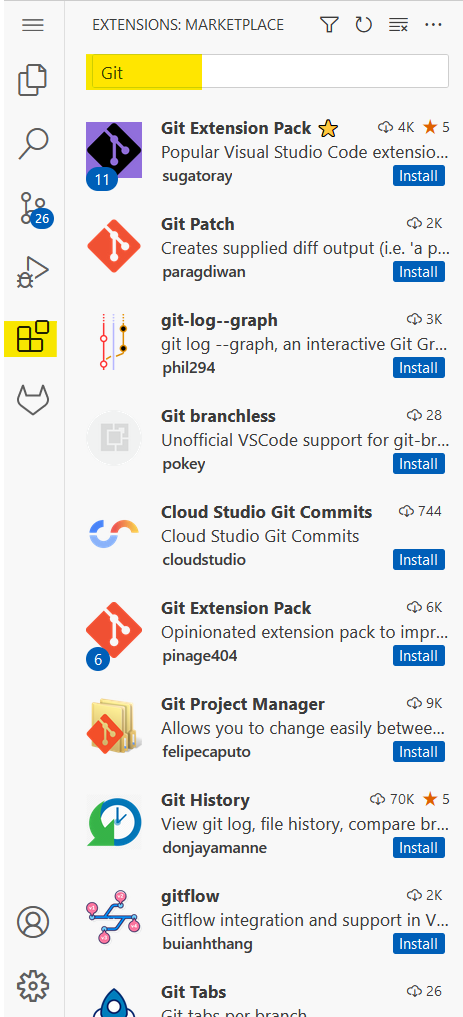
You can install and activate any of the thousands extensions available by clicking on the extension icon
 and searching
for a key word.
and searching
for a key word.
-
You can close and resume the browser window anytime during your specified run time. By clicking on My Interactive Sessions in the upper menu bar, you can resume your session as explanied in step 3.
-
In order to terminate the session before the run time ends, go to My Interactive Sessions, select the respective session and click on Delete.
Example: Develop, run and debug Python code in a custom conda environment
If not yet done: Install the Python extension (see step 6 of example above).
-
Change into the working directory where your Python code is located by clicking on the menu icon
→ File → Open Folder. -
In the explorer, select the file you like to modify.
-
Do your modifications. They will be saved automatically.
-
Activate your custom environment to run the code with:
a. Press F1
b. In the search-window, type Python and choose Python: Select Interpreter

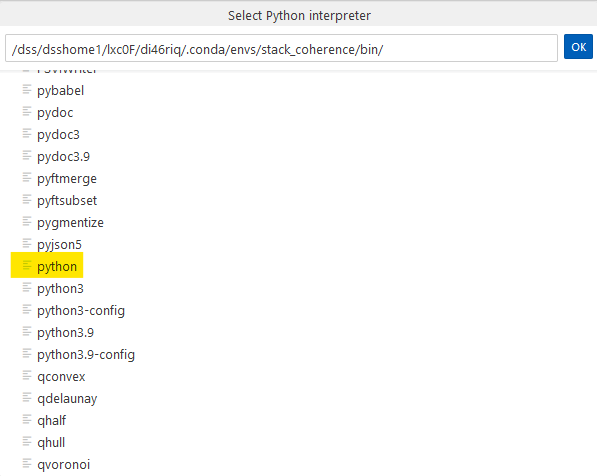
c. Click on + Enter interpreter path...
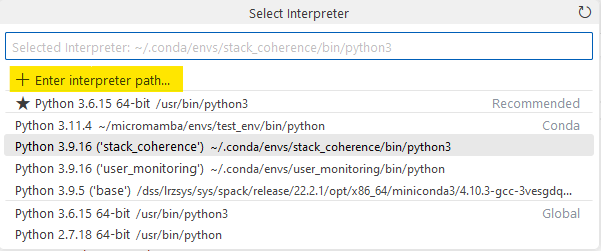
d. Enter the path to the Python-binary of your environment. You may click on Find... in order to browse for the file.
-
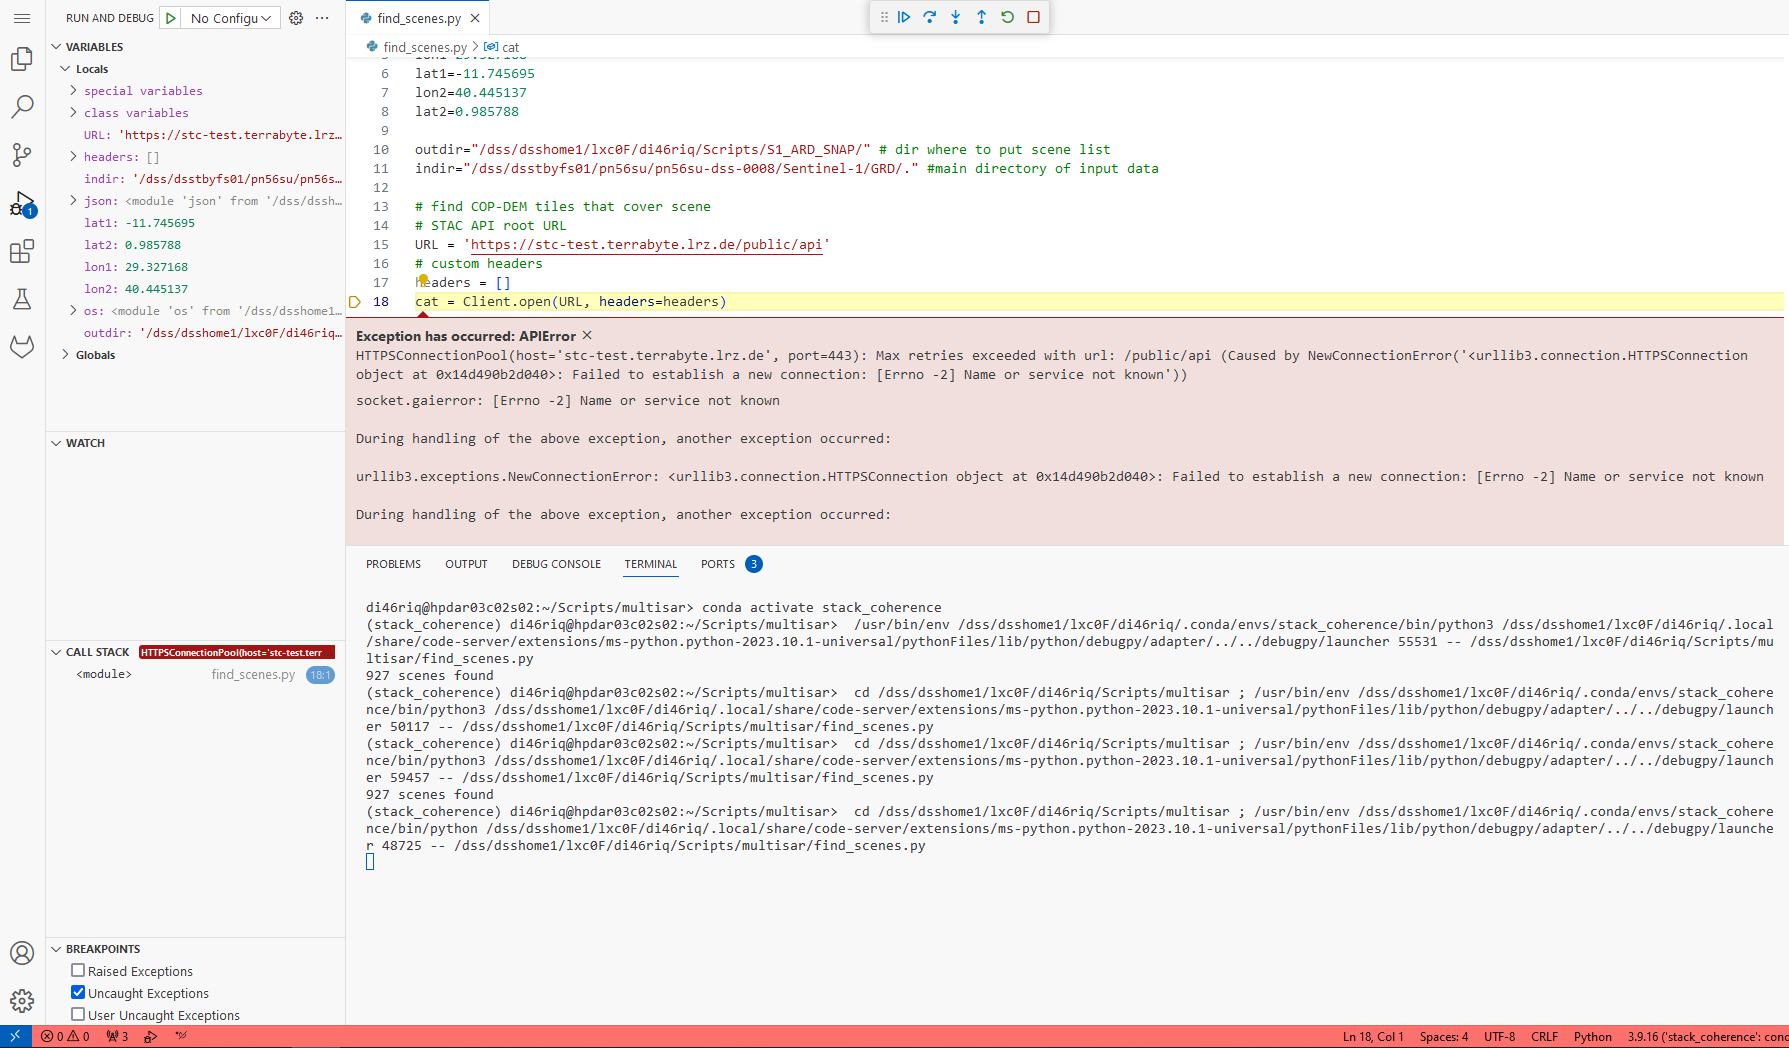
Click the Run and Debug-icon, and then Run and Debug in order to run the code and get debugging information

Example: Connect to DLR-GitLab
- Change to the explorer view:
![]()
- Change to the folder where to clone the GitLab repository to: menu icon
![]() → File → Open Folder
→ File → Open Folder
- If necessary, create a new folder and change into it as described in the step before.

-
Open a terminal: menu icon
→ Terminal → New Terminal -
In the terminal, your working directoy is automatically set to the folder in your explorer. Now clone the repository by typing into the terminal Attention: You will be asked for your DLR-GitLab credentials in a popup-window.
git clone https://gitlab.dlr.de/your/repo
- If not yet done, specify your Git user name and email:
git config user.name "Surname, Name"
git config user.email "Name.Surname@dlr.de"
- Select the branch you would like to work with or create a new branch by clicking on the current branch in the lower left corner (in our case the master branch).
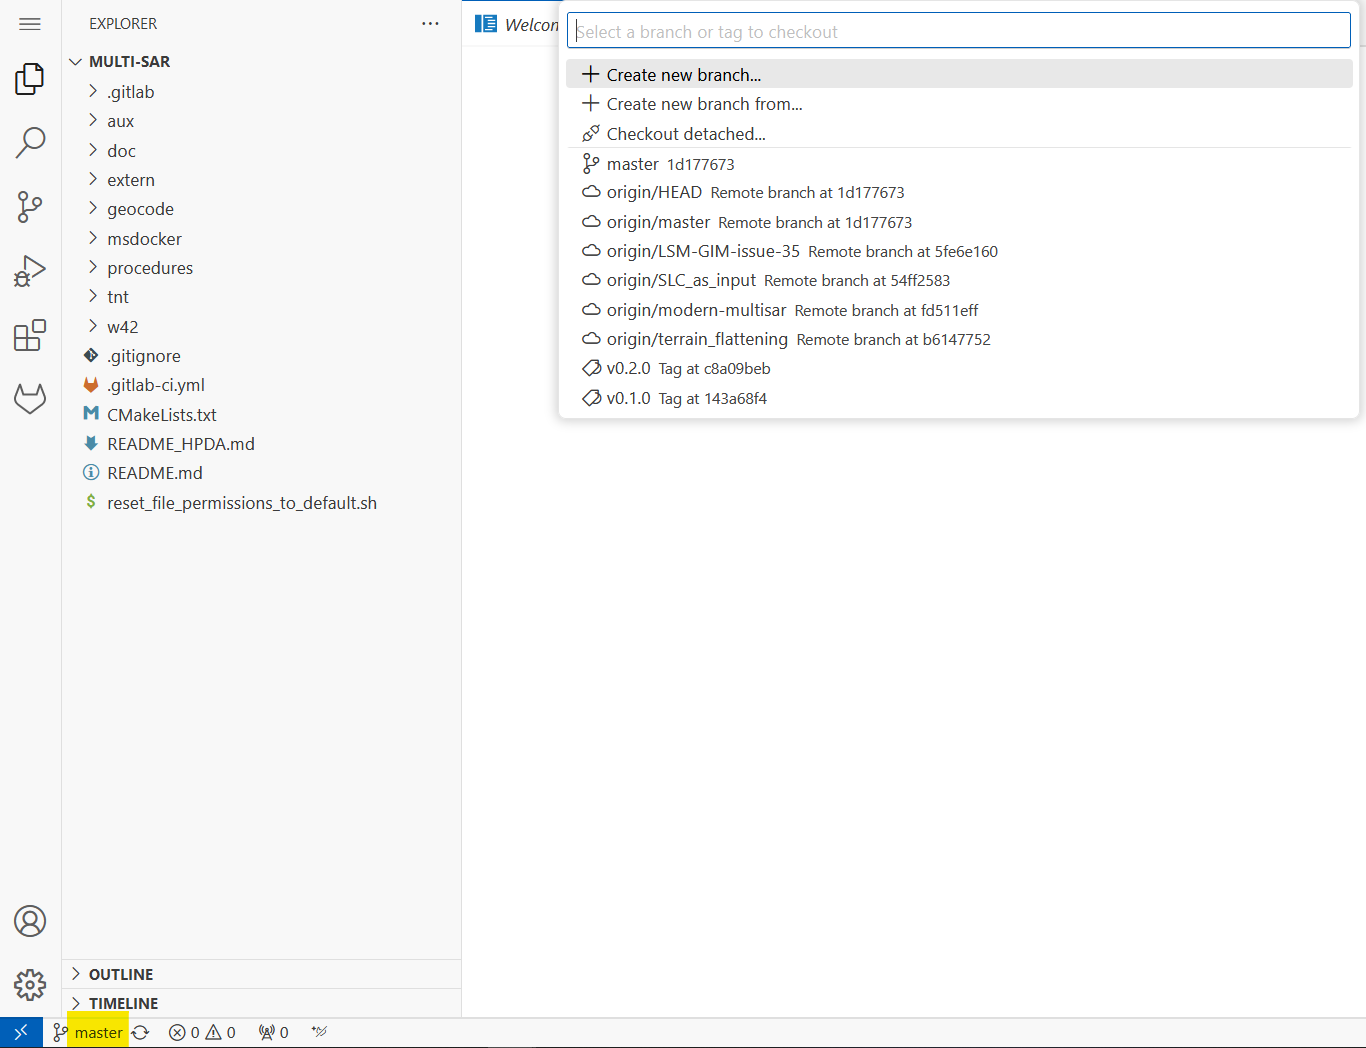
-
The current branch will be displayed in the lower left corner.
-
Make changes, test the code, etc.
-
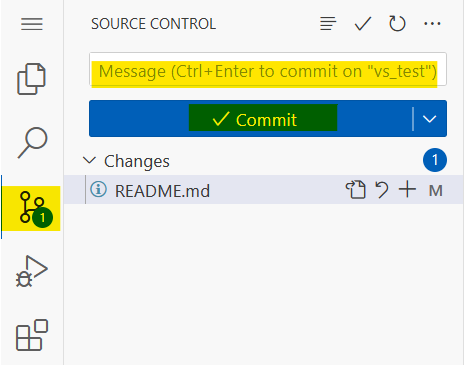
To commit the changes, change to the source control section where all changes are listed. Enter a commit-message and click on Commit. You may also stage the changes beforehand or directly stage them when prompted. Attention: You will be asked for your DLR-GitLab credentials in a popup-window.
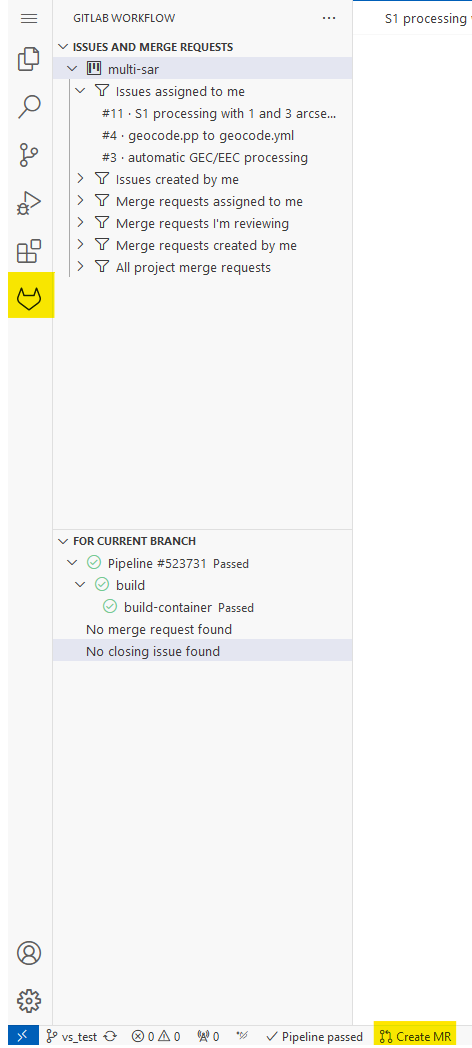
Merge requests can be made directly out of VS code, but this requires to install the extension "GitLab Workflow". The installation and setup process is very straightforward and explained in the official GitLab documentation: https://docs.gitlab.com/ee/user/project/repository/vscode.html
Once the GitLab workflow extension has been setup, it can be opened via
the GitLab-icon
![]() and merge requests can be made by clicking on Create MR at the bottom
left of the browser window:
and merge requests can be made by clicking on Create MR at the bottom
left of the browser window:
Connect to terrabyte via SSH from a local VS Code session
-
Open your local VS Code editor and install the Remote-SSH extension.
-
Got to settings (Crtl + ,) and search for remote.SSH.showLoginTerminal in the search field. Activate Always reveal the SSH login terminal. This setting only needs to be configured once.
-
Press F1 to open the list of available extension functionalities, select Remote-SSH: Add new SSH-host, and enter the SSH command to connect to the terrabyte login node (ssh [your ID]@login.terrabyte.lrz.de).
-
Press F1 and select Remote-SSH: Connect to Host, then select login.terrabyte.lrz.de.
-
In the terminal enter your terrabyte credentials and your 2FA token.
-
Open the folder where you would like to work. You will unfortunately be prompted again for your credentials. After completing another round of authentication, you should be able to work normally.
-
To test your code as a SLURM job, open a new terminal and submit your SLURM script with sbatch.